BlueStacks Setup
Category: Getting Started
Installing PowBot on BlueStacks 5
This guide will walk you through setting up BlueStacks 5 and installing PowBot using the new PowBot Installer.
Prerequisites
Before starting, ensure you have:
- Java 11 or higher installed (see Installation Guide for Java setup)
- Downloaded the PowBot Installer (
powbot-install.jar) from the download page - A stable internet connection
Step 1: Download and Install BlueStacks 5
- Download BlueStacks 5 from the official website
- Important: Download BlueStacks 5, not BlueStacks 4 or BlueStacks X
- Run the installer and follow the installation wizard
- Launch BlueStacks 5 after installation
Step 2: Create a New BlueStacks Instance
BlueStacks allows you to create multiple instances for running multiple bots simultaneously.
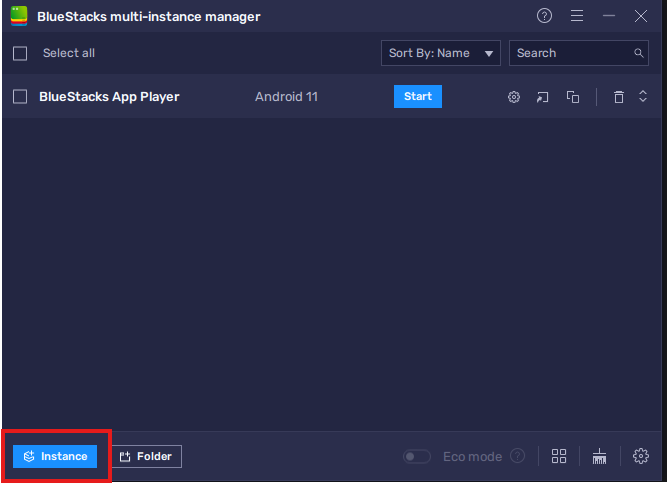
Open Multi-Instance Manager
Start by opening the BlueStacks Multi-Instance Manager:
Create Fresh Instance
- Click the
Instancebutton at the bottom left - Select
Fresh Instance(always use fresh instance for clean setup)

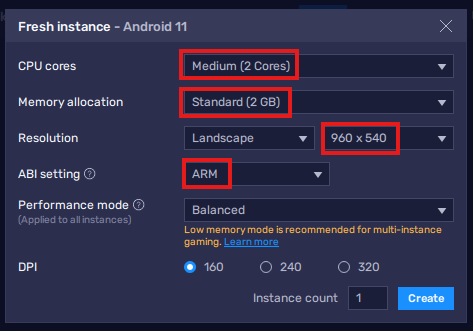
Configure Instance Settings
- Select
Android 11as the Android version

- Configure the following recommended settings:
- CPU Cores: 2 (minimum)
- Memory allocation: 2GB (minimum)
- Resolution: 960x540 (recommended for performance)
- ABI Settings: ARM
Step 3: Enable Developer Options and ADB
Start the Instance
Click the Start button to launch your new instance:
Enable ADB (Android Debug Bridge)
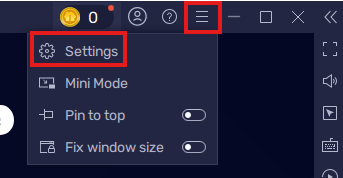
- Once loaded, click the hamburger menu (☰) in the top right
- Select
Settings
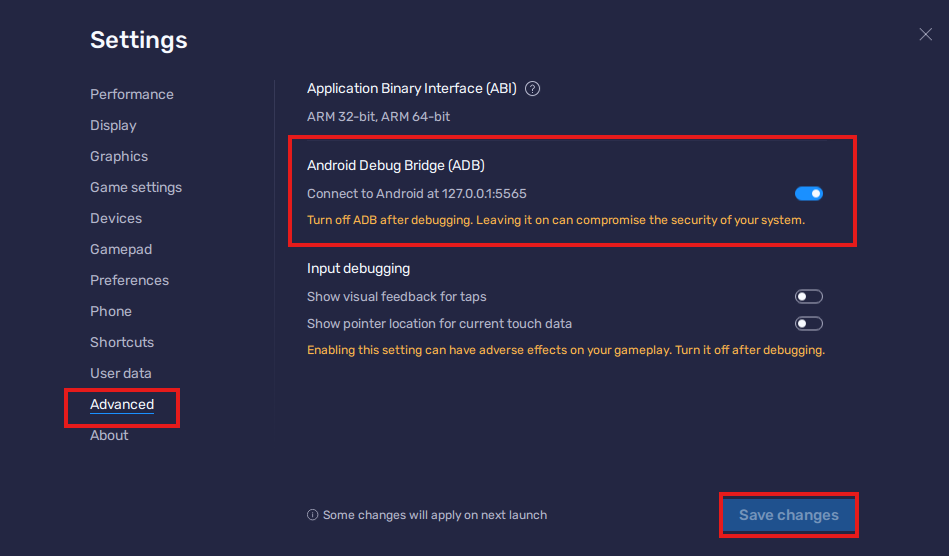
- Navigate to the
Advancedtab - Enable
Android Debug Bridge (ADB) - Important: Note down the ADB address shown (e.g.,
127.0.0.1:5565) - Click
Save changes
Step 4: Run PowBot Installer
Now that BlueStacks is configured, run the PowBot Installer:
- Open a terminal or command prompt
- Navigate to where you downloaded the installer
- Run the installer:
java -jar powbot-install.jar
Initial Setup Screen
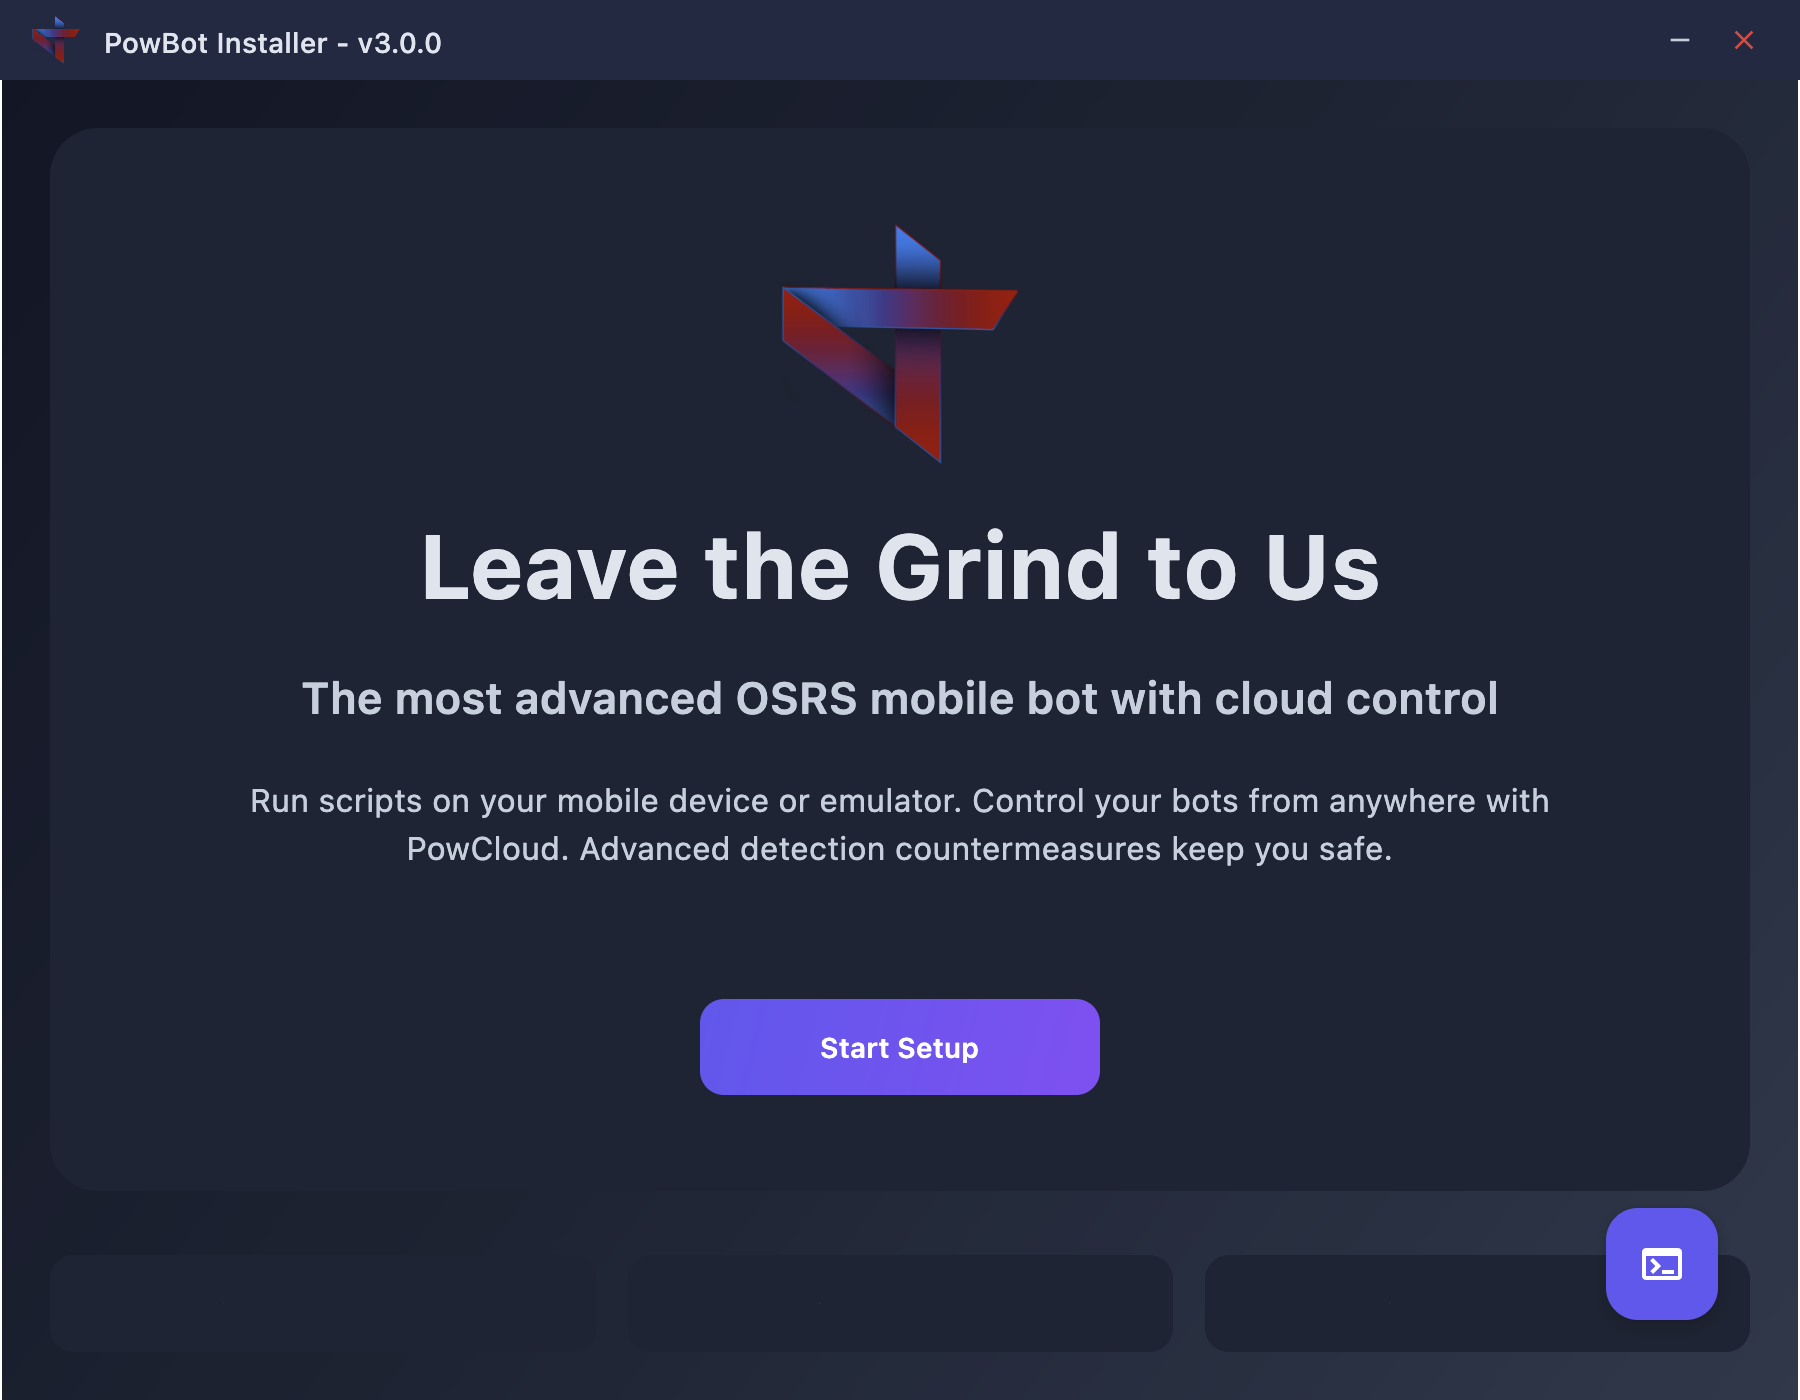
- Click "Start Setup" when the installer opens
Android SDK Setup
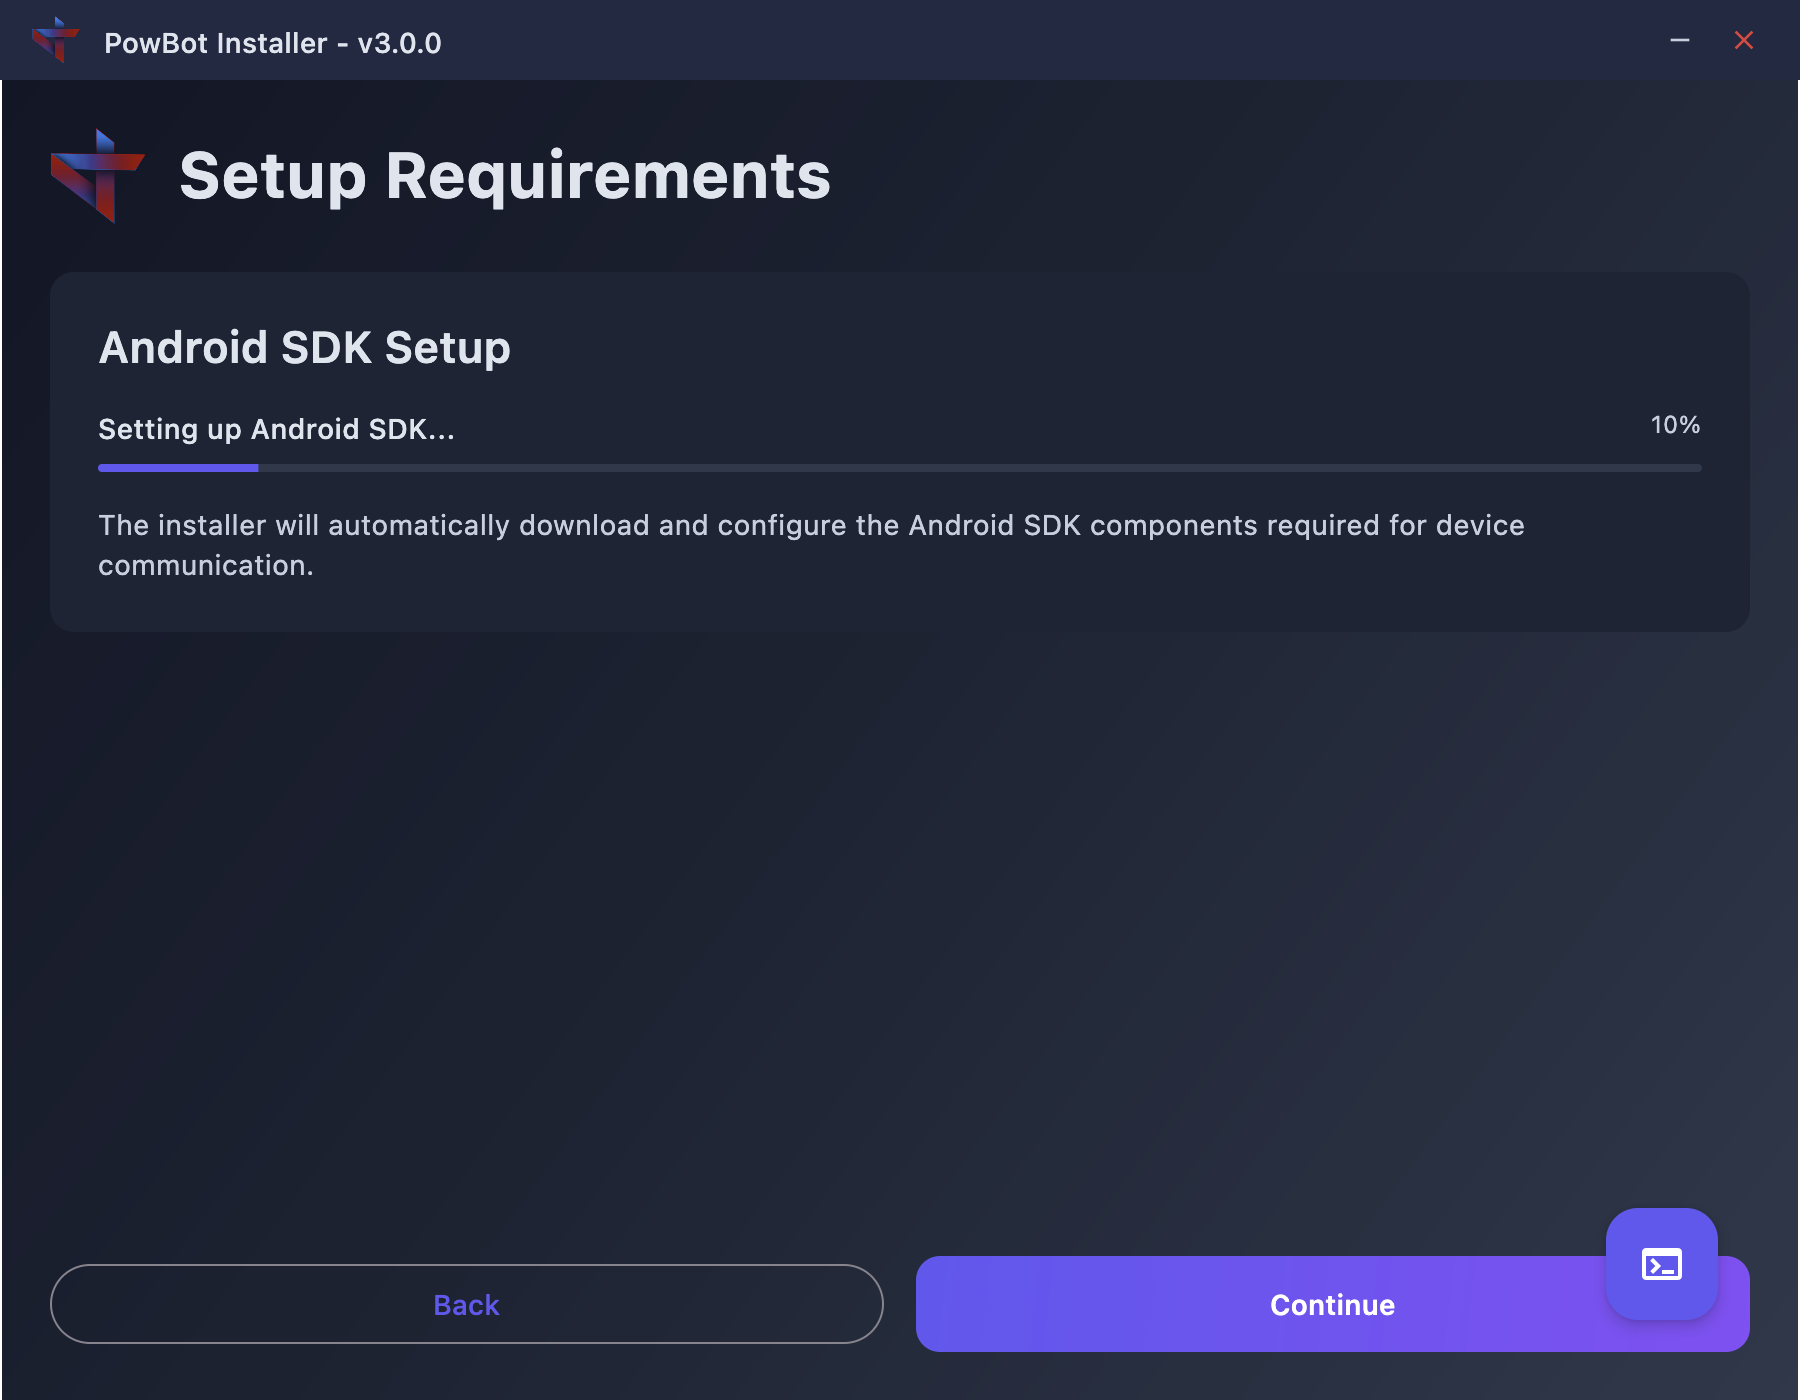
- Wait for the Android SDK setup to complete (this happens automatically)
- Accept the Android SDK license when prompted
Step 5: Select BlueStacks Instance
After the SDK setup:
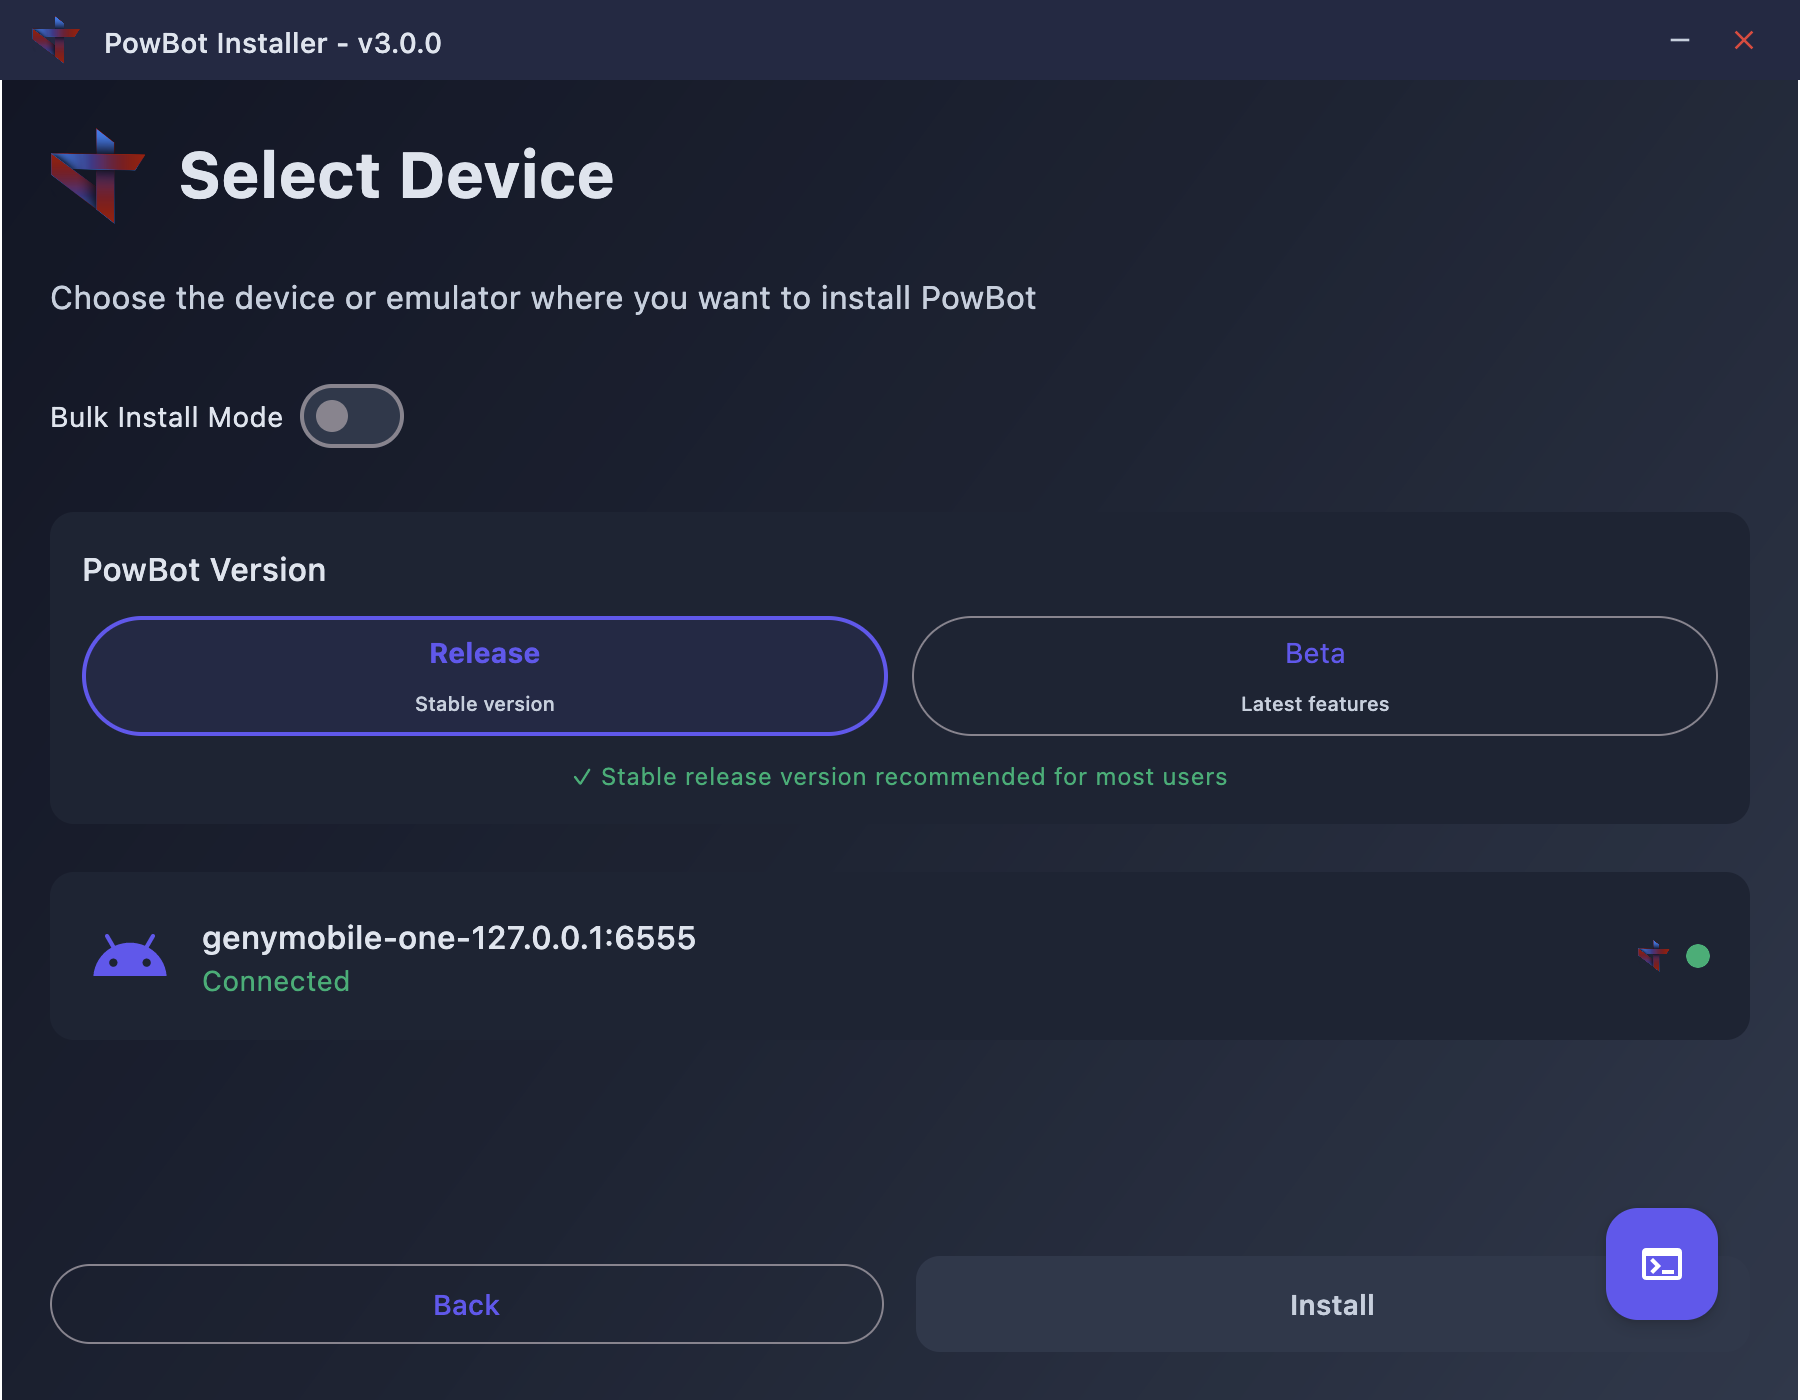
- The installer will automatically detect your BlueStacks instance
- You should see your BlueStacks instance in the device list
- It will show as connected with the address you noted earlier (e.g.,
127.0.0.1:5565)
- It will show as connected with the address you noted earlier (e.g.,
- Select your BlueStacks instance from the list
Step 6: Choose PowBot Version and Install
- Select the PowBot version:
- Release: Stable version recommended for most users
- Beta: Latest features but may have bugs
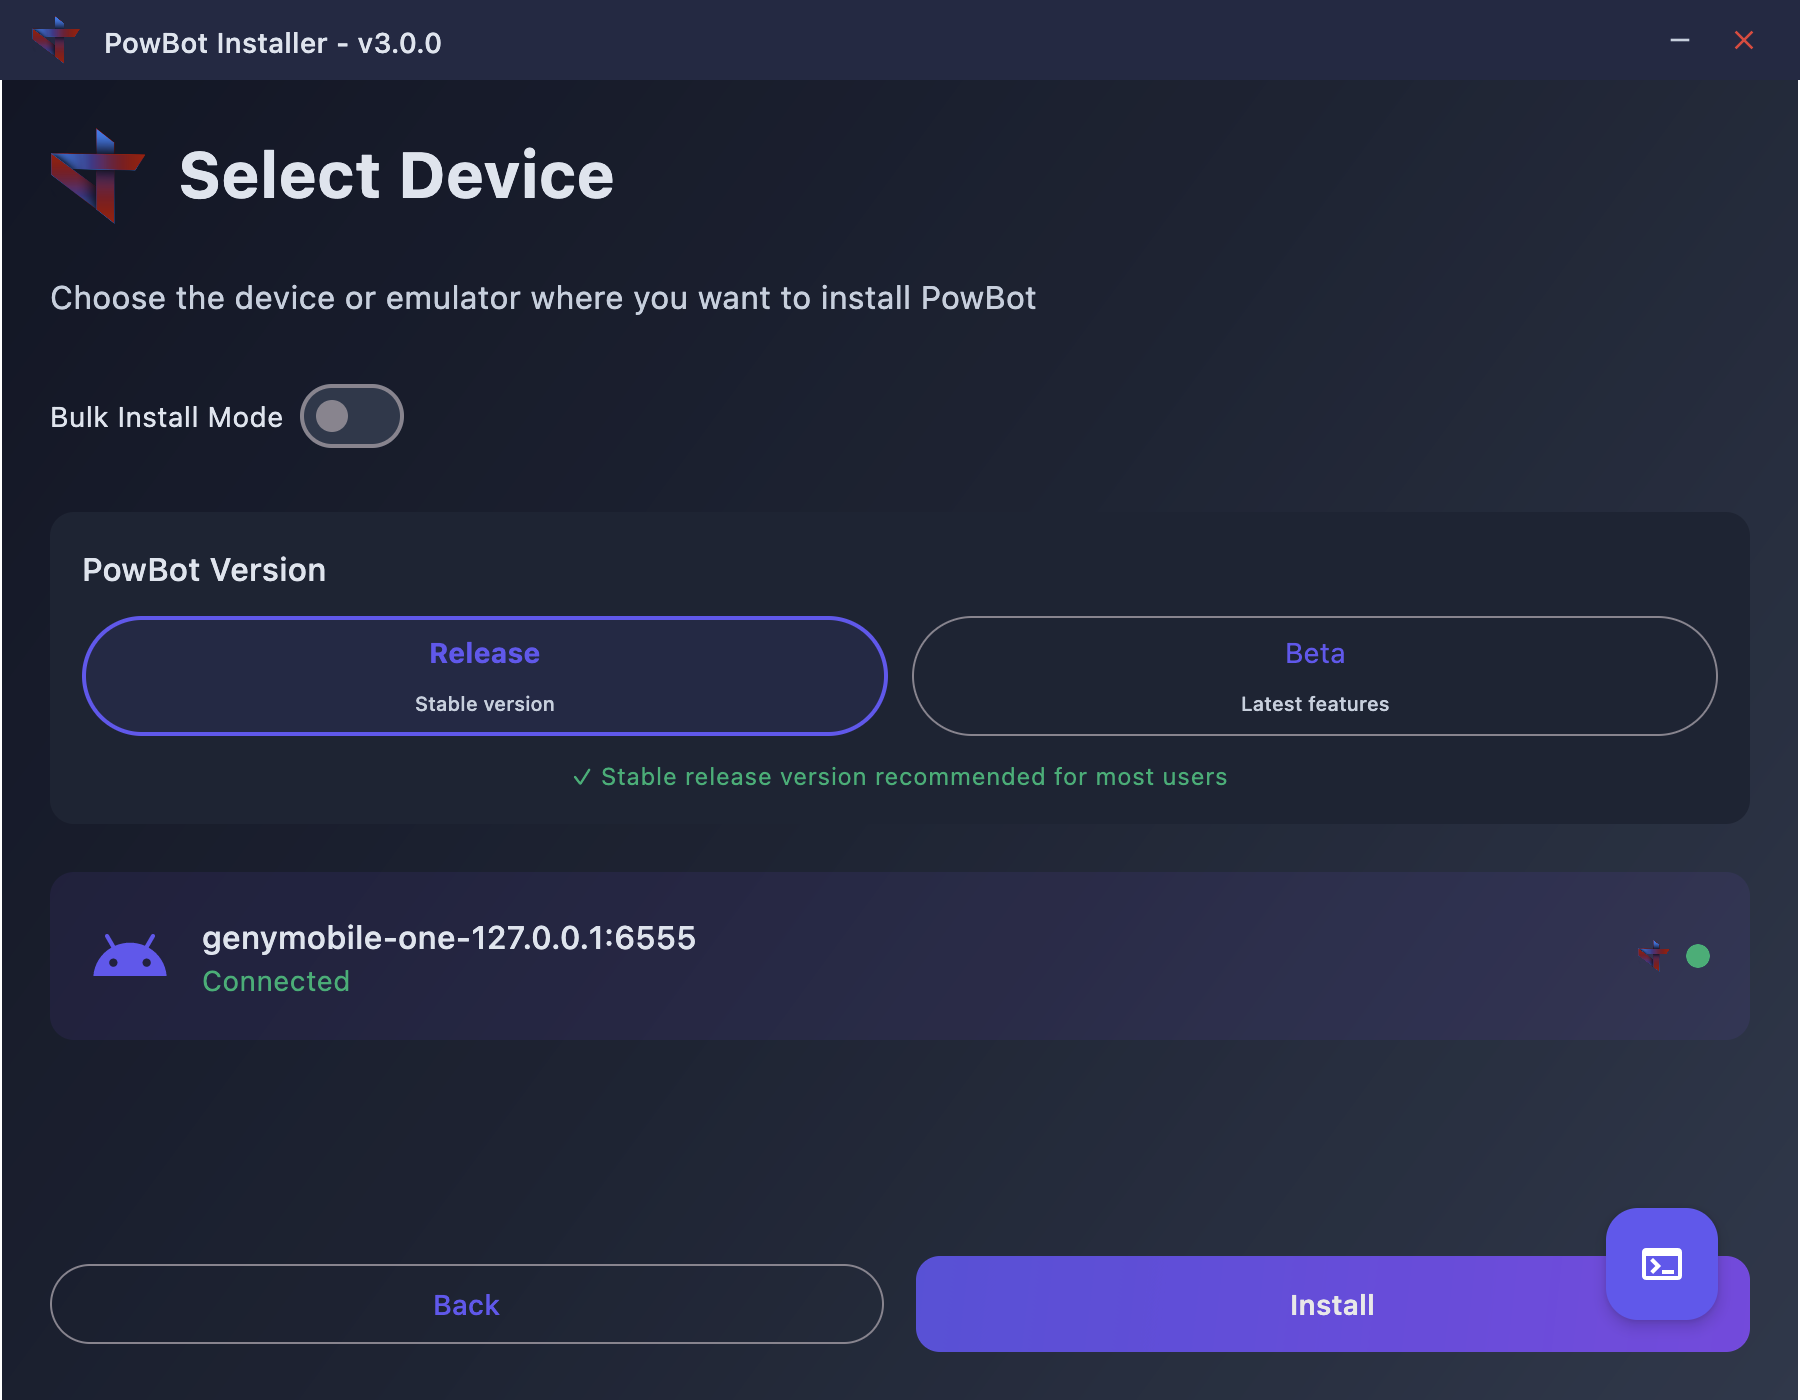
- Click the
Installbutton
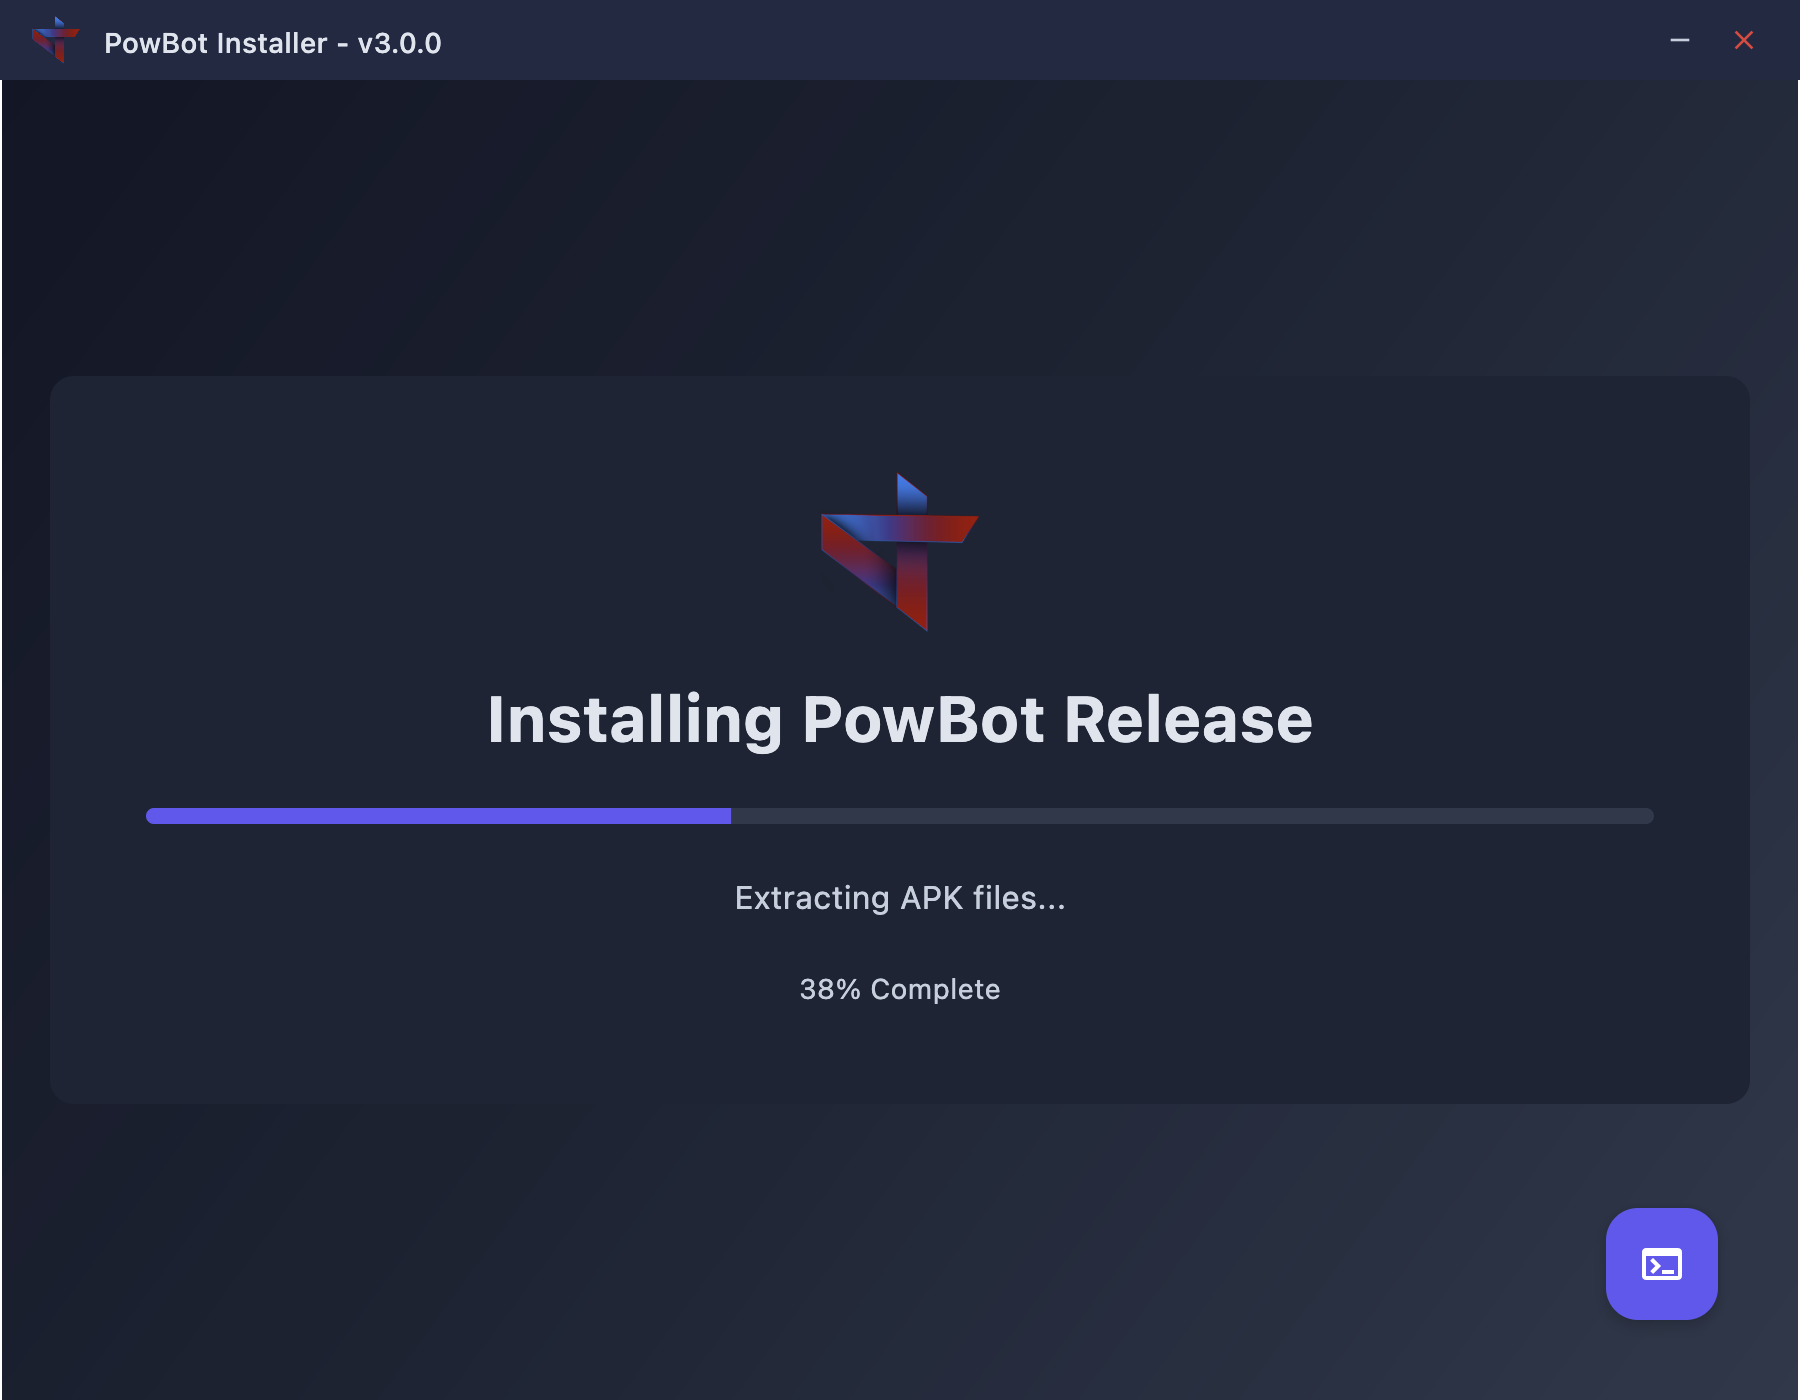
- The installer will:
- Extract APK files
- Build PowBot for your BlueStacks instance
- Install the application
- Configure necessary permissions
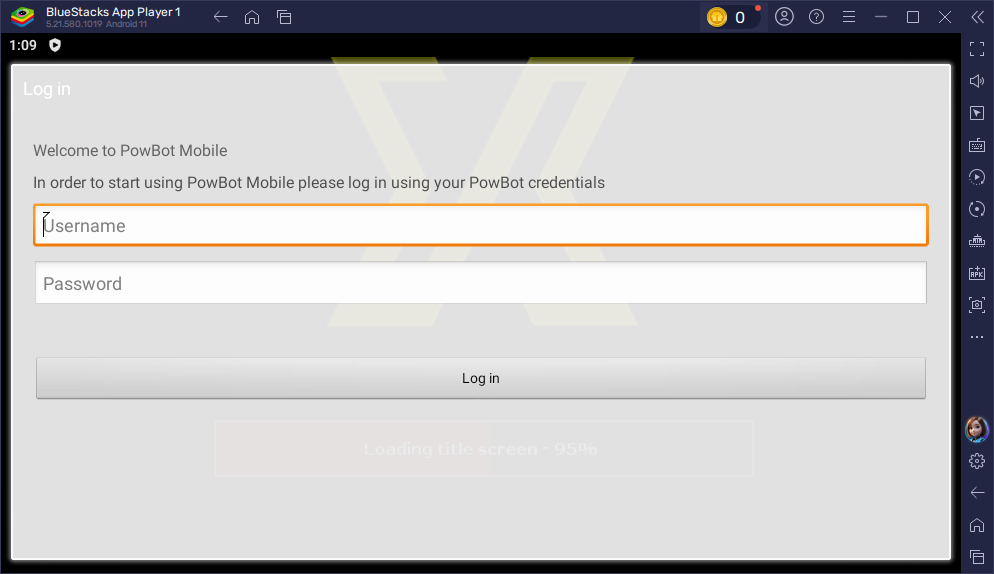
Step 7: Launch PowBot
Once installation is complete:
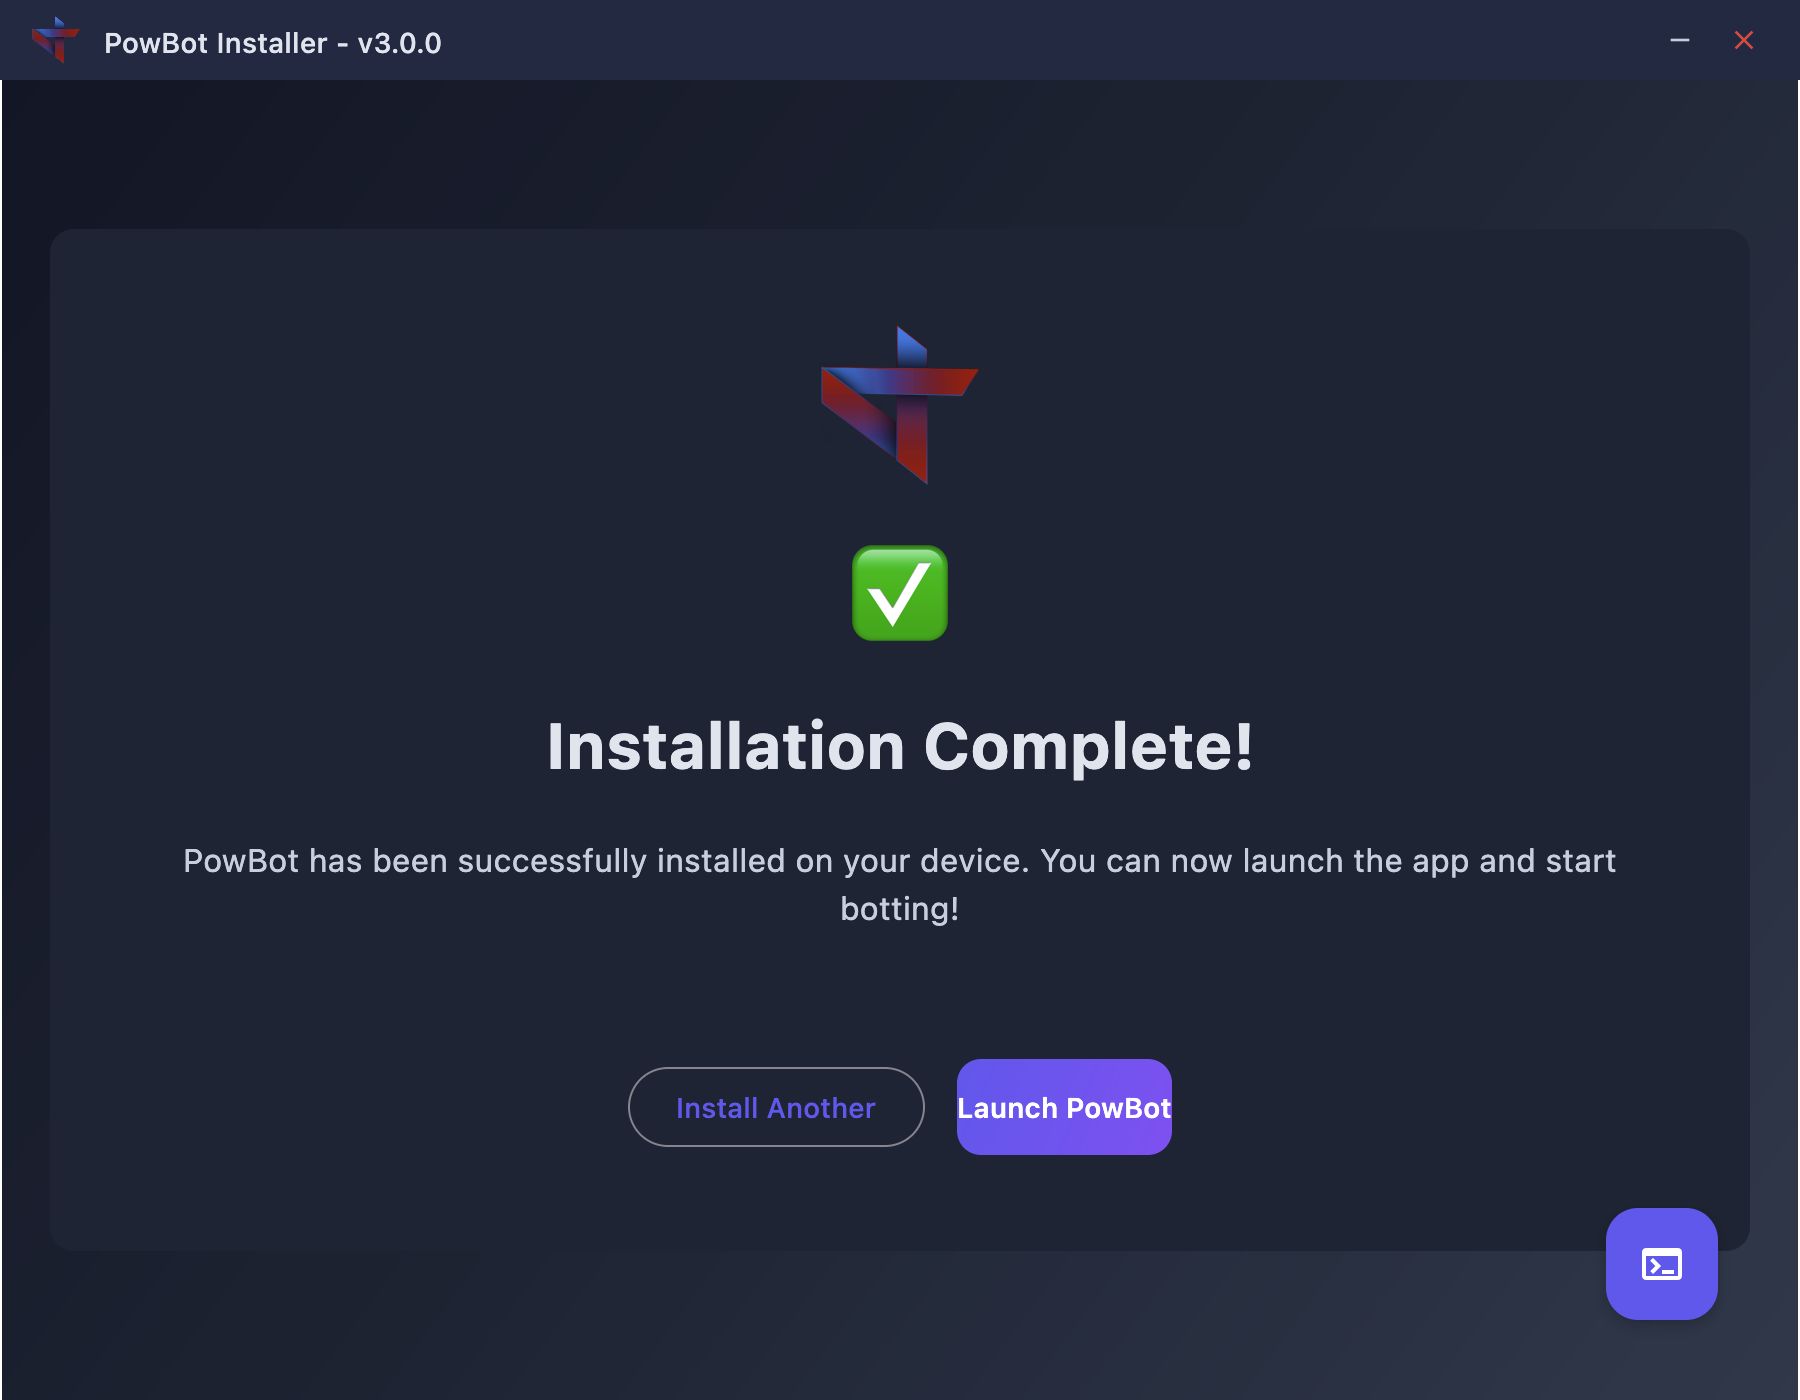
-
You can either:
- Click "Launch PowBot" in the installer
- Or open PowBot from the BlueStacks home screen
-
The game will open, followed by the PowBot login screen
Troubleshooting
BlueStacks Instance Not Detected
If your BlueStacks instance doesn't appear in the installer:
- Ensure ADB is enabled in BlueStacks settings
- Verify BlueStacks is running
- Try manually connecting via ADB:
# Navigate to PowBot's ADB tools (created after first installer run)
cd ~/.powbot/android/platform-tools/

# Connect to BlueStacks (use your noted address)
./adb connect 127.0.0.1:5565
Performance Issues
If you experience lag or crashes:
- Increase allocated resources in BlueStacks settings:
- CPU Cores: 4 or more
- Memory: 4GB or more
- Close unnecessary applications
- Ensure virtualization is enabled in your BIOS
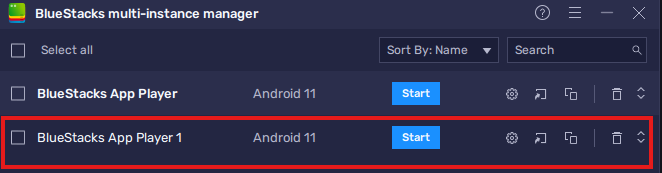
Multiple Instances
To run multiple bots:
- Create additional fresh instances in BlueStacks Multi-Instance Manager
- Configure each with unique ADB ports
- Run the PowBot Installer for each instance separately
- Select "Install Another" after each successful installation
Tips for Optimal Performance
- Use Fresh Instances: Always create fresh instances for new bots to avoid conflicts
- Resource Allocation: Allocate at least 2GB RAM and 2 CPU cores per instance
- Graphics Settings: Use lowest graphics settings in BlueStacks for better performance
- Regular Restarts: Restart BlueStacks instances periodically to prevent memory leaks
- Disable Unnecessary Features: Turn off BlueStacks notifications and extra features
Need Help?
If you encounter issues:
- Check the main Installation Guide for general troubleshooting
- Join our Discord server: discord.gg/powbot
- Post in the #help channel with:
- Your BlueStacks version
- Screenshot of any error messages
- Your system specifications